|
Important! Temprecord saves your program settings in a file so that when you start the program again your settings are restored. Normally when you upgrade the software these settings are carried over to the newer version, but you should not assume this is the case. It pays to check the program settings (start the Temprecord program and click on Options on the main menu) after you have finished installing.
Pay particular attention to the topic of Named Parameter Sets, and how these affect the the use of default logger parameters. |
Setup Welcome Screen
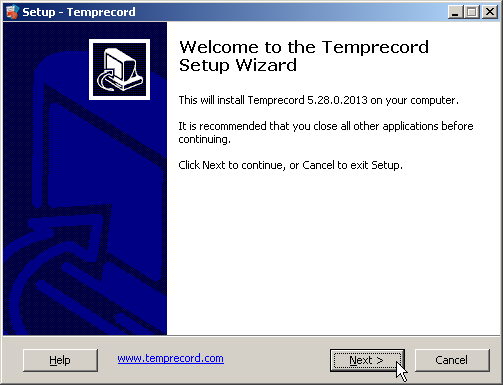
To install Temprecord, run the file TRW-SETUP.EXE. The setup welcome screen will display:
|
At most points in the installation you can click on the Cancel button to abort the process. Any changes setup had made to your computer should be "rolled back", and any existing settings if any should be preserved. You can also click on the Back button to return to a previous step. |
The setup welcome screen will show the software revision of the version of Temprecord you are about to install. Click on the Next button to continue and display the Installation Type screen:
Selecting the Installation Type
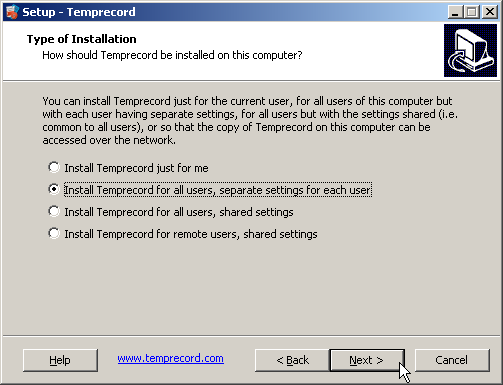
Install Temprecord Just For Me
If you choose this option, Temprecord will be only be installed for the current user. That user will have an entry on their start menu and a shortcut on their desktop unless these options are deselected in the later steps. Other users will not be able to see any shortcuts or data unless they have been granted access to the relevant files of that user. Use this option when there are several users of the same computer, and the other users will not require to use Temprecord. Installing Temprecord "Just for Me" avoids cluttering up the desktops or start menus of the other users.
Install Temprecord for All Users, Separate Settings
If you choose this option, Temprecord will be installed for all users, but each user will have separate settings. Each user of the computer will have an entry on their start menu and a shortcut on their desktop unless these options are deselected in the later steps.
|
With this option, if any user makes changes to the settings, any subsequent users will find their settings unchanged - i.e. the settings are independent for each user. This option is intended for situations where one computer is used by many users, but it is necessary for each user to have private settings and/or data. Each user will need to set up the correct COM port and any other settings required. |
Install Temprecord for All Users, Shared Settings
If you choose the first option, Temprecord will be installed for all users and the settings will be shared. Each user of the computer will have an entry on their start menu and a shortcut on their desktop unless these options are deselected in the later steps.
|
If any user makes changes to the settings, any subsequent users will find those settings altered. This option is intended for situations where one computer is used by many users and it has a reader attached. Once one user sets up the correct COM port for the reader, it will be correct for all users. |
Install Temprecord for All Users, Shared Settings, Remote EXE
Choose this option if the Temprecord executable file will be installed on a remote server (i.e. a network drive) and workstations on the network will access Temprecord over the network. All users will share the settings.
|
Temprecord recommends that where possible the software be installed on all computers that will be running the program. This installation option is provided for those cases where deployment to all workstations is impractical, however the operation of Temprecord will be less than optimal.
With this option, there are several points to be borne in mind:
•Temprecord should only be installed on the remote server. It should not be installed on the workstations as well. •Unless you have good reason for not doing so, we recommend you stay with the default installation folder of •All users must have write access to the above folder if they need to be able to change the program settings. If they do not have write access, Temprecord will be unable to save the settings INI file when the program exits. In this instance Temprecord will not report an error. •If any user makes changes to the settings, any subsequent users will also find those settings altered. For this reason, the settings for the COM port may not be correct on all machines, depending on the configuration of the serial ports. Also, the list of recently accessed files will be of little use, as the pathname stored will likely refer to another user's computer. •If network users are intending to use the Temprecord Reader Interface to read loggers, the USB drivers will need to be manually installed. •The file association between .TR files and Temprecord will need to be manually set up, if users want to be able to open .TR files by double-clicking them.
|
|
You will not be able to advance to the next page unless one of the four options is selected. |
Importing Existing Settings
The Temprecord installer searches for existing copies of TRW.INI (this files stores the settings for Temprecord) on the computer. Earlier versions of Temprecord placed the TRW.INI file in different locations and the installer looks in those locations. If it finds one it offers the user the chance to import the settings from that file. If it finds more than one it will offer the most recently accessed copy.
|
You won't see this screen if: •the installer didn't find any TRW.INI files in the usual locations. •the installer found a TRW.INI file but it was located in the location that it was going to install anyway. In this instance the existing INI file will be left intact and those settings should be inherited by the new installation. |
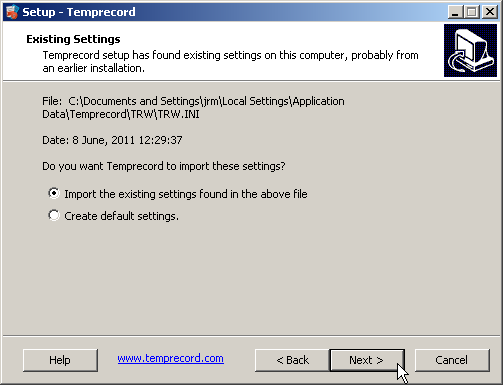
If you choose Create default settings the existing file will not be imported and all of the settings will be assigned default values. You will likely have to set (at least) the reader COM port before you can use Temprecord.
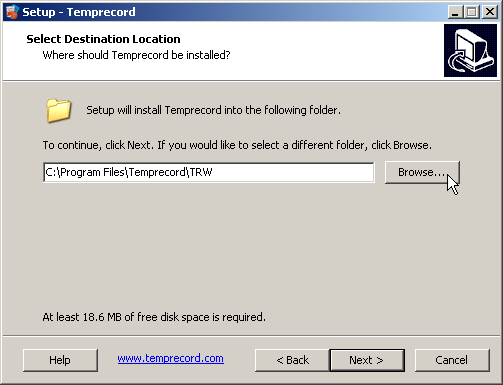
Selecting the Destination Location
The next screen allows you to choose the folder the Temprecord program files will be installed into.
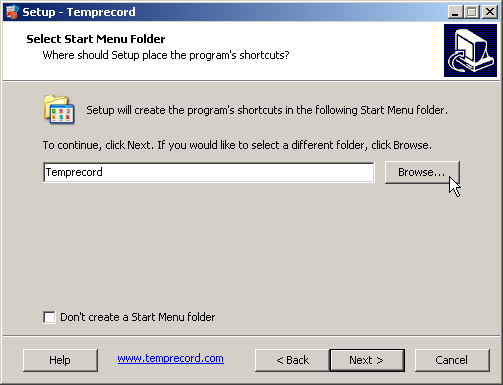
Selecting the Start Menu Folder
The next screen allows you to specify where the start menu entry will be located. Once again, unless you have good reason, we recommend you stick with the defaults. If you don't want the Temprecord program entries to appear on the start menu, check the box labeled Don't create a start menu folder.
Additional Installation Tasks
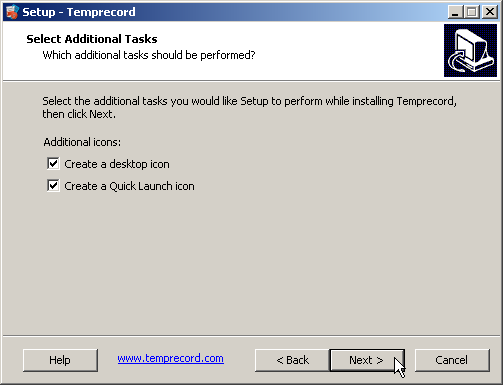
If you don't want an icon to be added to the desktop, uncheck the box labeled Create a desktop icon on the next screen. Similarly you can decide whether a quick launch icon is added to the taskbar.
|
|
 A "Quick Launch" icon is a small button (
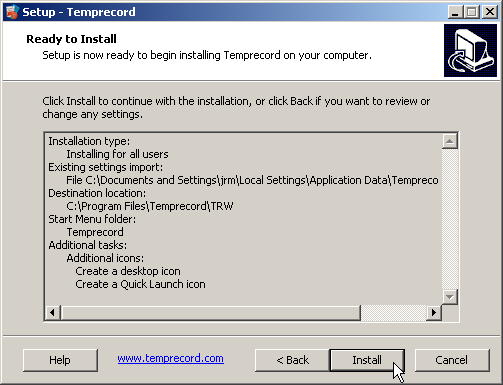
Summary of Installation Settings
Before installation starts, the installer will show this screen which will contain a summary of the options you have selected. If you are satisfied, click the Install button and the installer will begin copying files and creating menu entries and shortcuts. If you're not satisfied, use the Back button to go back and change settings, or use the Cancel button to abort installation.
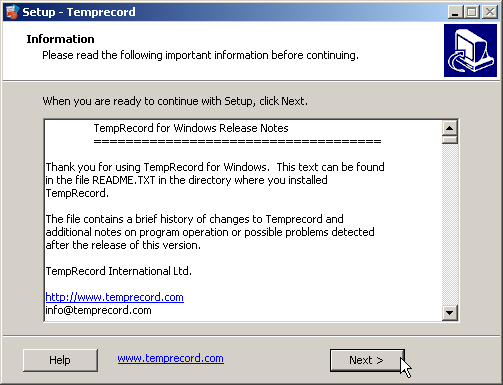
Release Notes
After installation completes, the release notes for the version you are installing will be shown. The changes and fixes to the program are shown with the most recent at the top. You can also see those changes in this help at What's new in version 6.3?.
|
It's a good idea to read the contents of this file, as there might have been changes made to the program that require you to check settings. |
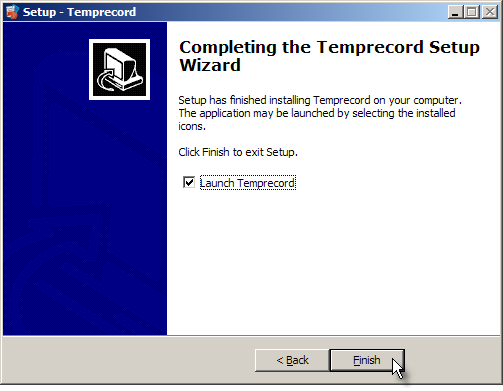
Installation Completed
The final screen of the installer gives you the opportunity to start the Temprecord program when the installer has exited.
Reinstalling
The Temprecord program can be installed on as many computers as you wish. Just take the original installation disk that you installed this copy of Temprecord with, place it in the drive of the computer you wish to install it on, and run TRW-SETUP.EXE from the drive.
Installing the Reader Interface
|
Important! Don't plug in your reader interface before installing the Temprecord software. |
Of course you will require another reader interface unit if you wish to program and start loggers on the second computer.
In order to use the reader interface unit, your computer must have a spare USB port. As part of the installation process, the necessary USB driver files are normally copied to your computer and installed. This part of installation normally proceeds without problems, but you might need to manually install these drivers with some computers or versions of Windows. See the topic Installing Temprecord Reader USB Drivers for more information.
When you first start to install Temprecord, you may see this warning:
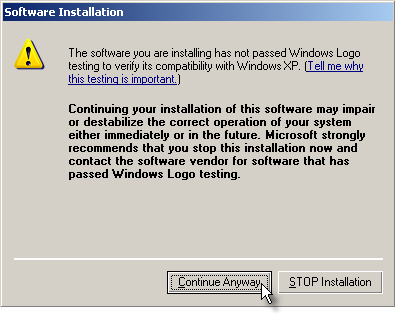
Click on Continue Anyway. You may need to repeat this step as the installation involves copying two distinct sets of driver files.
When the installation has completed, plug in the reader interface. You may see the following warning:
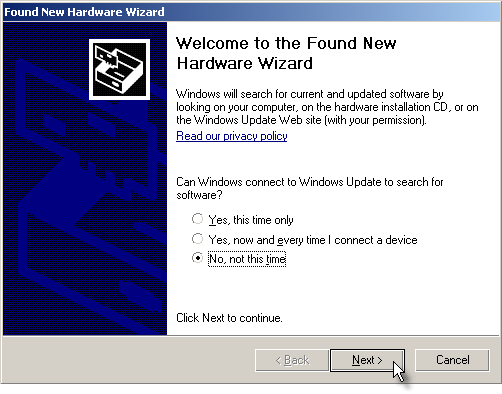
Select No, not this time and click the Next button. You will see the following screen:
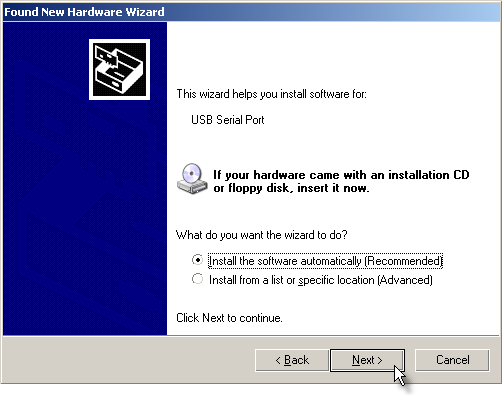
Select Install the software automatically and click the Next button.
Once again, the same procedure will likely repeat as there are two separate sets of driver files that need to be installed for the Temprecord Reader.
To install Temprecord on another workstation on a network, see the topic Installing Temprecord on Networks
See Also
Installing Temprecord on Networks
Installing Temprecord Reader USB Drivers